The Reinforcing Bar Grades window ( Job Settings )
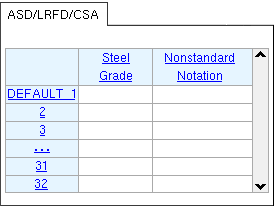
The " ASD/ LRFD/ CISC " tab is shown here. The " AS4100 " or " Eurocode " tabs are just like this tab, with the same two columns. Which tab is shown depends on the selected " Connection design method ."
- Cut ( Ctrl + x ), copy ( Ctrl + c ) and paste ( Ctrl + v ) are available to help you more quickly edit steel grades. You can also choose " Cut " " Copy " or " Paste " on the context menu that opens when you right-click a cell. See the warning .
Also see :
- Text entry widgets (moving from cell to cell and within cells)
- Material steel grade ( Status Display )
1 . To open the Reinforcing Bar Grades window, use one (1) of the following methods:
▸ Home > Project Settings > Job > Material Grades > Reinforcing Bar Grades .
▸ In Modeling or the Drawing Editor use a keyboard shortcut , or click the icon.
2 . The Reinforcing Bar Grades window opens. Which tab is shown on the window depends on the " Connection design method " that you are using. The tabs that may be shown are " ASD/LRFD/CISC " or " AS4100 " or " Eurocode ." Step 3 is the same regardless of the tab that is shown.
3 . See the Warning before making any changes to this window. To add a new steel grade, fill out the columns for the first blank line (press the Tab key or Shift + Tab to move from cell to cell). The type of information that may be entered beneath a particular column on this window is explained below:
Line number: The index number (a positive integer) of the steel grade -- see the Warning . Line 1 sets the default steel grade and is the standard steel grade that may be referenced when Home > Project Settings > Fabricator > Member and Material Piecemarking > the " Submaterial " tab > "
Show non-std grade notation with piecemarks on member details " is checked.
Steel Grade: Any string (up to 29 characters) to denote the name of the steel grade.
Nonstandard Notation: Any string (up to 29 characters) to denote that a particular steel grade is not the standard steel grade.
For submaterials: A callout is generated next to that material's submaterial piecemark callout on the member detail when Home > Project Settings > Fabricator > Member and Material Piecemarking > the " Submaterial " tab > "
4 . When you are done making changes to the Reinforcing Bar Grades window, use the buttons at the bottom of this window to reorder listings on the window or close the window or undo your changes.


"Move Up" or "Move Down" change the order of items on the window. See the Warning .
"OK" (or the Enter key) closes the window and saves the settings on it to the Job Settings file in your current Job . See the Warning .
"Cancel" (or the Esc key or the
button) closes the window without saving any changes.
"Reset" undoes all changes made to this window since you first opened it. The window remains open.

